Bringing you tips, deals, coupons, reviews, tutorials, and DIY's to save you money! Deals so Krazy they'll put you in a Daze

Most Recent Post

Showing posts with label home decor. Show all posts

Monday, January 9, 2023

Non-Christmas Winter Decor Ideas

#FoundItOnAmazon 
This post contains paid affiliate links, please read our Advertising Disclosure Statement.


Have you been looking for non-Christmas ways to decorate your space for the Winter season? 


Well one of our writers and content creators, had the same issue. Michele loves decorating her home for not just the holidays, but for the seasons as well and she has found some great ideas to inspire you and get you started. Check out Michele's #FoundItOnAmazon Non-Christmas Winter Décor Idea List here!


@micheledennis78 After years of trying to decide how I wanted to decorate for Winter, this year I finally did it. It's not much but it's good start. Now to say goodbye to Winter and get ready for Spring😊 #Winter #WinterDecor #WinterDecoration #HomeDecor ♬ A winter romance song with an impressive beautiful piano melody(1129748) - Love`s BGM


 Other Krazy Deal Daze Post You May Be Interested In:

Friday, June 21, 2019

4 Budget-Friendly Ways to Brighten Up a Dingy Home

4 Budget-Friendly Ways to Brighten Up a Dingy Home
This post contains paid affiliate links, please read our Advertising Disclosure Statement.

You do not have to spend a fortune to create the home of your dreams. 

With a little creativity and smart thinking, you can brighten up any dreary home. Here are four budget-friendly ways to lighten up any dingy home:


Brighten with White

Rooms painted and decorated in light colors will appear brighter than the same space that is outfitted with dark colors and fixtures. White is the best choice of color when looking to make your house look less dingy. This non-hue does not absorb color, meaning that it sends light bouncing back to other surfaces. This scattering of light makes any room feel brighter and airier.

Touch Up Your Windows

The windows are the source of light for your home. Thus, it makes sense that they need to be clean and free of debris so that light can filter in at maximum effectiveness. The material and style of your frames also make a big difference in how much light makes it through. In addition to giving your windows regular cleanings, be sure to pay attention to the color of the frames and the window dressings. Lighter colored frames will reflect light more naturally and brighten the entire room while breezy curtains will create a softer effect in the space.

Mirror Mirror on the Wall

The old trick of adding mirrors to a room to make it look brighter and bigger truly works. You can double the amount of sunlight that streams into a room by hanging mirrors that reflect light. Strategically hanging a large mirror directly across from a big window will yield the most effective brightening results. Or try a small collection of mirrors in different sizes to lighten a dark and dingy staircase. The good thing about mirrors is while there are some more expensive ones out there, there are also lots of mirrors you can buy that are pretty cheap.

Update Light Bulbs

The bulbs in your lighting fixtures can play a big role in how bright a room appears. LED bulbs with a brighter output will instantly brighten a room. A cooler daylight color of bulb can transform a room from dark and grey to light and cheery. A true white bulb will deliver the most brightness.

You do not have to live with a dark and dingy home. The right color palette and decor items can turn any dreary space into something that sparkles and shines with brightness. By getting creative, you can design this look on any budget.

If you’re looking to do more than just brighten up your home, check out this other article for more ideas on home improvement projects that you can do on a budget!

Thank you for stopping by and checking out our 4 Budget-Friendly Ways to Brighten Up a Dingy Home! Which tip did you find most helpful? Be sure to let us know in the comments below! 

If you enjoyed this post, we’d be very grateful if you’d help it spread by emailing it to a friend or sharing it on Twitter and/or Facebook. Don't want to lose this? Pin it on Pinterest so you can get back to it later!

Have a great day!


Tuesday, October 9, 2018

Handy Tips on Interior Design that Won’t Break the Bank

Royalty-free stock photo https://www.shutterstock.com/image-photo/back-view-happy-couple-dreaming-their-265634081
 Handy Tips on Interior Design that Won’t Break the Bank
This post contains paid affiliate links, please read our Advertising Disclosure Statement.

You want your home to look like a designer's dream, but you don't have wads of cash to

throw around to make it happen. Fortunately, there are ways you can create an exquisite
design for your home's interior without breaking your budget. All it takes is patience and
a good eye for a bargain. Let's examine four ways you can get the décor of your dreams
on a budget.

Buying Gently Used Furniture

Brand new furniture can be enticing. Just take a walk through a furniture store and you
are surrounded by furniture that would look good in every corner of your home. Unfortunately,
if you take a look at the price tag, you will go into sticker shock. You can blow your decorating
budget on just one couch or chair. For those looking for a bargain, gently used furniture is the
way to go. Sometimes thrift stores used to make money for charity have fantastic deals on
everyday household items and furniture. Then, not only are you receiving a good deal, but
you’re also helping to support others in need.

Invest in Certain Items


Certain items make a big impact on a space. Curtains, rugs, and artwork can bring a room
together. If you have a small budget, it is important to set aside a part of it to cover these c
ritical items. Consider them an investment in your home's beauty and functionality. Window
coverings are one area you don't want to skimp on. Invest in really nice curtains to spruce up
the room as they are cheap and help diffuse harsh sunlight into your rooms. You can add
blinds for light control or shutters for a different look.

Rugs are another area you need to invest in. They offer an additional layer of color and
texture on top of your flooring. They are also practical offering a soft surface to walk and
sit on. High-quality rugs will last for decades with routine care. Artwork can also brings
beauty into the space. On a limited budget, the smart move is to invest in a focal point piece.
It doesn't need to be the most expensive, but it should carry a significant impact.

Patience and a Plan

When it comes to decorating on a budget, the biggest way to save money is to have patience
and a plan. Patience is required to find your ideal pieces at a bargain price. You must wait for
sales and price markdowns. You need to spend time finding those gently used furniture pieces
that pop up on occasion. You have to gather the parts for your DIY projects. You need to
decide where to invest your budget. You can also use that time to save up money for the
next phase of your design project.

A plan is ultimately how you save the most money. When you have a plan, you have a
roadmap of what you want to buy. You know the textiles you desire, the furniture pieces you
need and the look you are going for. With a plan, you aren't buying unneeded or impulse
items. Plus, as you gather the things for your project, you can check them off one-by-one
with a sense of budget satisfaction.
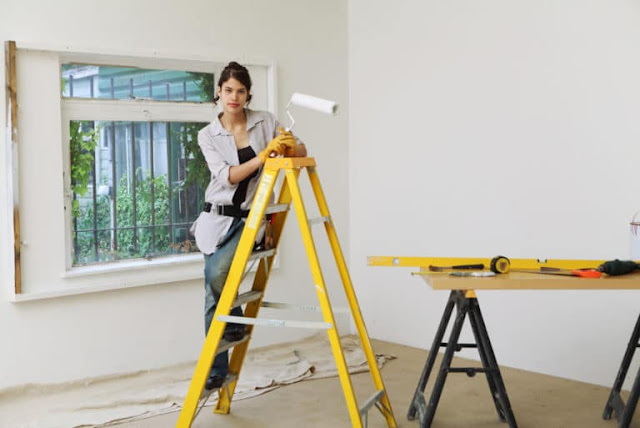
Go the DIY Route


Image Source: MoneyCrashers.com

One of the most significant costs of professional interior design is the labor involved in some projects.
It is not uncommon to hire professionals to handle installing a new floor or painting the walls.
For someone on a budget, labor costs can put certain upgrades out of reach.


Fortunately, a bit of DIY skill and some sweat equity can keep the budget under control.
There are videos and how-to articles available on our website to help you tackle many
of your interior design projects. Additionally, many home improvement stores have experts on
hand for advice and some even teach classes on common DIY projects. If a project is a bit
too daunting, ask your family and friends to help. It's likely one of them has done a similar
project and can give you an experienced hand. It will make the work go faster and usually
won't cost more than a pizza and a drink.

Don't let your dreams of a well-decorated home go to the wayside due to budget concerns.
You can use these tips to help you get the interior design you dream about without breaking
the bank in the process.


Thanks for stopping by to read our Handy Tips on Interior Design that Won’t Break the Bank. Which tip was your favorite? We would love to hear your feedback. Please let us know in the comments below!

Have a great day!!


Other Krazy Deal Daze Post You May Be Interested In:

Sunday, October 7, 2018

Garage to Man Cave Makeover Phase One

Garage to Man Cave Makeover Phase One
This post contains paid affiliate links, please read our Advertising Disclosure Statement.


In every home we have ever lived we have never used our garage as well, a garage... We have always utilized it as an additional living space and place to hang out. Our newest home features a 500 square foot garage that we have been using as storage while we were unpacking and settling in. Well, fast forward 2 years and we are still not 100% unpacked and our garage has turned into a cluttered mess... So we decided enough is enough! It's time to remodel the garage.

So first things first we have to get everything out of the garage so we can start cleaning and prepping the walls for new paint. To accomplish this we needed to rent a storage unit. Because of what we needed to store and how much we needed to store, we had to spend the extra money on a large climate controlled storage unit. Thankfully there were three of us in the family that was in need of a storage unit so we combined our stuff and split the cost three ways.


Once we got everything in storage, it was time to start prepping the walls to be painted. To do this we first removed all the outlet covers and switch plates. Then filled and patched all the holes that were in the walls. We used Silka Pro Select Stucco Patch and ProForm All Purpose Joint Compound and a putty knife to accomplish this. Dry time for the Stucco patches took at least 1-hour minimum for a partial cure, depending on temperature, humidity, and depth of repair. Full cure can be achieved in 72 hours. The Drywall patches took 24hrs to fully cure. Note that wet or damp conditions will slow the drying process. Subsequently, 24 hours dry time may not be sufficient. We also used Dap painters acrylic caulk to seal up a few things before painting. According to instructions, you should allow the caulk to dry 2 hours, longer in cool/humid conditions before painting.


While waiting for our patches and caulking to dry we moved on to the next item to be done before we started painting. We have an extra refrigerator that we use in our garage and where we wanted to move it to would have blocked the light switches and garage door opener. So we had an electrician move them over a few inches to accommodate where we wanted to relocate the refrigerator. Then we went over all the wall patches with Wall Texture by Homax in Orange peel, to match the texture of the rest of the walls. Once painted the patches should blend right in.


After everything is set and dry, it's time to paint. Here is a list of supplies we needed for this project:


First, we took the masking tape and taped off along areas we did not want to be painted whatever color we were using at the time. After taping off the baseboards and door trim we also hung plastic over the door. Although we are going to apply a new finish to the floors we still laid down a drop cloth to avoid having to potentially clean up a big mess in the event of an oops!

Now it's time to open the paint, this is where a paint key comes in handy, you can also use a screwdriver if you don't have a paint key. Although we had our paint premixed when we bought it, we still mixed our paint using a stir stick. We also punched drainage holes into the rim of the paint can with a screwdriver and hammer. This hack helps lessen the amount of paint that can accumulate around the rim and lid.


Using our small trim brush and trim guards we painted along the ceiling, baseboards, light switches, electrical sockets.., etc. We also were very careful when painting certain corners as the walls were going to be painted in different colors. Once all the trim painting was done we grabbed our paint roller and proceeded to paint the rest of the wall. We repeated this process for each wall color. Each wall took 2-3 coats of paint to reach the desired finish that we were happy with. 


Please enjoy our video on Phase one of the Garage to Man Cave Makeover below


Because of the theme of this makeover, which will be revealed at a later date. We chose Behr's Crimson Red and Asphalt Gray as our wall colors. Next step will be cleaning and prepping the floors.


Thank you for stopping by and checking out our Garage to Man Cave Makeover Phase One! Which Krazy Deal are you most excited about this month? Be sure to let us know in the comments below!


If you enjoyed this post, we’d be very grateful if you’d help it spread by emailing it to a friend or sharing it on Twitter and/or Facebook. Don't want to lose this? Pin it on Pinterest so you can get back to it later!

Have a great day!


Popular Posts